Laser texturing & molded surface finishes
A quiet detail.
A distinct surface.
A subtle surface finish begins in the mold. Our bright-pattern housing shows how a carefully prepared tool surface becomes part of the product’s visual identity.
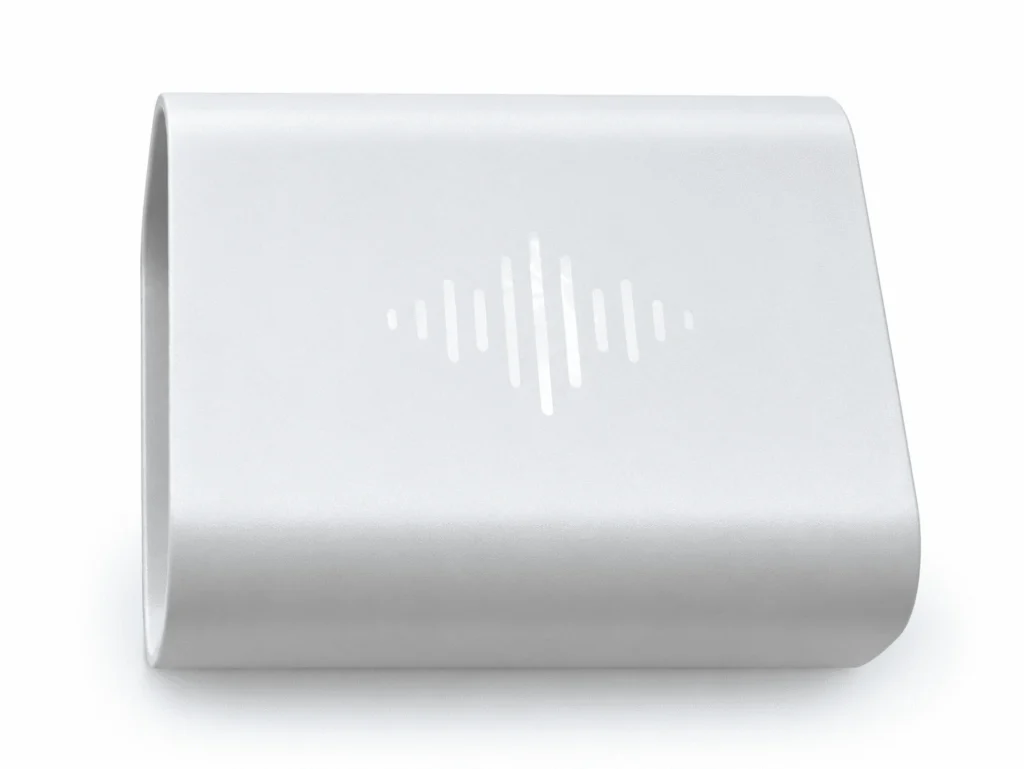
Designed to catch light,
not dominate the shape.
On this actual molded housing, a very shallow pattern creates a restrained bright detail. Its visibility changes with the viewing angle. The finish is carried by the molded surface, so the tooling decision becomes part of the product’s identity.


The finish, in context.
View the bright motif together with the housing’s curvature. Different angles help communicate the intended appearance before a physical sample is approved.
Approve a physical finish.
For your part, review the surface under agreed lighting and viewing conditions. A screen image can communicate direction; a molded sample establishes the acceptance reference.
The work in the tool
The cost is in making
the subtlety repeat.
This finish was created by processing the mold with specialist imported five-axis laser equipment. The route carries a higher tooling cost, so it makes sense when the surface detail is an important part of the product rather than an incidental decoration.
Five-axis laser texturing can place a digital texture on complex mold surfaces. The usable result still depends on the chosen pattern, the prepared steel surface and how the resin reproduces that detail in molding.
We connect specialist surface processing with the mold build and the molded-part review. Equipment availability alone is not the acceptance criterion; the appearance on your finished part is.
Process background: GF Machining Solutions on five-axis laser texturing.

A finish needs
more than a texture name.
Bring a physical reference or clear photographs. Identify the show face, pattern direction, boundaries, gloss contrast and areas that must remain smooth.
For curved housings, we also need to understand where a texture stops and how that boundary meets a parting line, port or mating component. Changes after the steel is textured can mean additional tooling work.
A reference plate helps describe the desired effect. It does not replace approval of the finish on the selected resin and product geometry.
Review the part before toolingKeep the surface requirement
through production.
The approved texture is only one part of a repeat supply specification. Material identity, the visible face and the inspection condition need to stay connected to it.
Specify the appearance zone.
Mark show surfaces and acceptable gate, ejector and parting-line locations. Define what the customer sees after assembly.
Agree the sample reference.
Review pattern clarity, contrast, color and visible marks together. Agree viewing distance and lighting, rather than judging unrelated photographs.
Hold the resin specification.
Our virgin-resin purchasing policy provides a defined starting point. Resin and color changes still need review because they can change how the surface reads.
Protect the tooling investment.
Surface condition and cleaning matter when the detail is shallow. The mold specification should cover how the working surface is maintained and how any repair is approved.
Have a finish in mind?
Send the appearance reference, visible surface zones, intended resin and CAD. We can discuss what belongs in the mold and how to approve the result.